Showing posts with label Project. Show all posts

Wednesday, November 2, 2011

Wordless Wednesday: Toddler's First Desk


I snagged this desk for only $10 off a Craigslist Ad. Really nice woman, she was worried I wouldn't want it because it wobbles and there's a juice stain on the unfinished wood. No big deal! We tightened the screws and I plan on paint and poly to make it make the girls' playroom and be more toddler craft friendly. 
Toddler is very excited she gets her very own desk! And she promptly asked for a "big chair" to go with it, which means I'm snooping garage sales and craigslist for a sturdy chair in need of some TLC.

Tuesday, November 1, 2011

Take A Guess

What do you think I have in mind for this?


We found this dresser over 3 years ago, minus the paint. The top converts to a changing table by folding down. It's pretty awesome. But we have no need for a changing table after we finished the closet changing station. So I've decided to make use of this dresser by making it a functioning piece for the girls' play room. So for fun, here are a few pictures of the gutting of the dresser. 


And we're saving the drawer fronts for a future project. 


I suppose I should explain why the drawer fronts are so supposedly random and why we can't bring ourselves to toss them... When I was pregnant with Toddler, I spent a few days handpainting recreations of our tattoos on the drawer fronts. Toddler loves them and I can't seem to let them go. So stay tuned to see what happens with the dresser and what I'll be doing with the drawer fronts!


Wednesday, October 26, 2011

Pumpkin Tutorial and Bragging on Hubby & Toddler

I hate carving pumpkins. I really dislike the feeling of the goo and guts. And even though they're left uneaten every single year, I still feel compelled to dig out all the seeds, save and clean them, then waste Olive Oil and my time by baking them. And I always challenge myself to carve something extravagant and "fun". This year, Pinterest inspired me to try something different and I left the amazing carving production to hubby. 


Yup. I didn't even cut them open this year. We were able to get these amazing pumpkins at a little pumpkin patch only 20 minutes from us (a huge improvement from last year when we drive 90 minutes and payed out the ass for every little thing). Toddler and Baby Girl were free and they each got a free pumpkin. Hubby and I were $7 apiece and pumpkins were only $3 each, regardless of weight! All of the games and activites were free of additional charge except for feeding the animals, which was only 25 cents for each little cup of food. And corn stalks were only a dollar. I dare you to find anywhere as kid friendly and family oriented with those prices!

On the way home, we stopped at the store to get a can of spraypaint and a package of thumbtacks.
Once home, I started by painting the bottoms. Maybe 5 super thin layers of spray paint and that was covered. I let it dry for an hour and then set them upright to paint the tops and sides. For really good coverage, I painted 6 super thin layers and made sure to get the cracks and crevices around and on the stems.

I then took a thick sharpie to the short pumpkin. That's all it took to do the spider web pumpkin. 
As for the spider, I spray painted the tacks with some spare black paint. This is a total of 70 tacks, one package from the store... if you want to do anything more extravagant, be prepared with plenty of them! They don't go as far as you'd think! This design was freehand, I wasn't looking for anything too flashy or complicated. All in all, I'm really happy with how they turned out! When kids are Trick Or Treating, I'll light a tealight or two in front of them so they're more visible.


I cannot help brag on hubby's awesome carving skills though! Look at that Haunted House!
And this is were I admit that Toddler BEGGED me to carve her a ghost. And I conceded. So it wasn't a completely carve free year for me, but that little ghost only took 8 minutes start to finish so I wasn't too upset by it, seeing as Hubby's pumpkin took almost an hour. And I downright refused to save seeds, which Hubby didn't mind at all.


And of course, Toddler's pumpkin! We decided to let her do her own instead of her sitting there bored and watching us carve what she wanted. She had a blast and we didn't have to deal with her chirping around us like an overexcited chipmunk while we were gutting a pumpkin with sharp knives.

Thursday, October 13, 2011

Playroom Curtains, Finally Finished!

Toddler is fairly destructive. She's just curious, wants to take things apart and hasn't come to the understanding that I can't always fix what she "disassembles". This went for her cheap vinyl window blinds as well. So I had to come up with curtains she would leave alone. This meant no generic free-hanging gathered curtains (she likes to hang on them and spin in them, not an option). So I found THIS DIY Roman Shade link on Pintrest and had a plan!

First of all, the above tutorial was a sew-free project. I'm a sew-er, so I modified the plans to fit my abilities (I just don't feel as capable with fabric tape, I feel like it would just fall apart.) Secondly, I needed fabric. We didn't find anything Toddler and I both loved at all 3 "local" fabric stores. Since we drove 90 minutes to get to them, it was frustrating to say the least. But.... redemption. We were looking for crayons, glue and other supplies at Target and Toddler grabbed a package of Twin Sized Sheets off a Clearance End Cap. I almost told her to put them back because she still sleeps in a toddler bed (or our bed... usually our bed). But a lightbulb clicked. I don't anticipate the need for blackout curtains in a playroom, so why not use this fabric? 


It was a success, we've decided to work the rest of the playroom off the colors of this fabric! And as a bonus, for only $7, I had enough fabric for the curtains and an entire flat sheet of fabric to spare for any other projects I think of for the play room.

Thirdly, I needed cheap vinyl blinds, regular Elmer's Glue and a hot glue gun.

Then I decided I wanted a valence for the treatment as well. So I found two of my old skirts, one pink and one teal, both miraculously matching the fabric Toddler picked out. There was just enough fabric to complete two valences for the two windows. Then, instead of a traditional rod, I wanted to try something a little more whimsical and cut a few small dry branches out of our brush thicket. I spray painted them and used plant hangers to fix them onto the wall. I then custom fit the valence to the branch and tada!

Here is the finished window treatment!


What do you think?

Sunday, July 31, 2011

Homemade Laundry Detergent? Really? Yup!

Well we've embarked on a new level of crunchy in the Smitty household. 


 I started using homemade laundry detergent. All it took was a bar of soap, washing soda, Borax and a grater! While I know Dove isn't a true soap, it's what I had on hand and I looked up reviews on using it for this purpose and most people didn't have any problems with it.

The Washing Soda was $3.39, the Borax was $4.05, the Dove bar was something I had in the pantry, but a bar usually costs about $1.50 and at only $0.50, the grater was a steal in the PX dollar bins. 

Grating the soap was the most difficult part. After about a quarter of the bar, the grater got clogged and wouldn't shave anymore. I ended up having to clean the grater 3 times before I was done. Not a huge problem, only time consuming. 1 cup shaved soap, 1 cup Washing Soda, 1 Cup Borax. I mixed the ingredients for a few minutes, poured it into a storage container, labeled it and was done!

I've already done a load of the kids clothing and a load of hubby's uniforms straight from the field. A half cup of distilled white vinegar in substitution of traditional softener and my laundry came out smelling like nothing! No scent, no residue, no funk. I have clean laundry and it was way cheaper than conventional laundry detergent! Toddler and Baby Girl have both worn clothing cleaned by this detergent and neither have had any skin reactions either! 

Now that I know it works, I want to try a few drops of essential oil to add a soft scent. Should I try Tea Tree Oil or Grapefruit? I don't have anything else on hand at the moment. And it will take a while for me to trust the detergent enough to try it on my cloth diaper stash. For now I'll stick with RnG as I've never had a problem with stink, stains or skin reactions with it.

Edited to add: I only used a tablespoon of the mix for a large load of laundry and half a cup of vinegar in the rinse cycle for a softener. 

Friday, April 15, 2011

Weekly Project 4/10-4/16: DIY Laundry Line

It's officially warm and sunny out! Which means it's laundry line season! 
This week, I'm going to brag about how we save (a lot of) money each year by line drying our laundry! 

This is my list of clothesline benefits: 
1. Cost Savings in electricity over using the dryer
2. Energy Savings in electricity over using the dryer
3. Significantly less work at removing stains (the sun is a natural bleach)
4. Laundry off the line smells so fresh!
5. The sight of a fully loaded clothesline makes me smile

And the benefits are doubled by the fact that we cloth diaper and use the laundry more than the average disposable diapering family. There really isn't a comparison to a clothesline full of fresh, clean diapers!
I'm sure I'll be posting a cloth diaper clothesline photo for wordless Wednesday as soon as baby is born and we have laundry up!

When we moved here, we were lucky enough to have laundry posts already installed in the backyard. However, my husband has made and installed laundry posts in the past. He's a DIY carpentry guru and I couldn't tell you exactly how he made the posts, but... I watched him do it and it's almost identical to this tutorial I found by Krista on her blog: Life, In A Nutshell

Amazing Photo by Krista at Life, In A Nut Shell
The only big difference I found was that we cemented the post, which made the project run about $25 total.

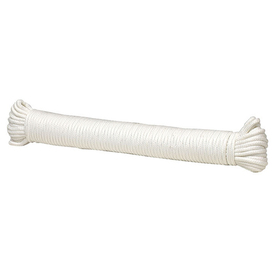
It never fails, I have to replace the clothesline each year, regardless of the "quality" of the line we buy. So instead of buying vinyl coated wire and the hardware and spending 10 minutes installing it, we get 200ft of 1/4" All Purpose Clothesline from Lowes. 


It runs about $18-$20 each year. Yes, it sags a bit, but the great thing about a simply knotted clothesline is that it's easy to unknot and tighten without using any tools. I run a sudsy washcloth down the line to clean it once a week, which gets rid of collected dust and dirt.

And clothespins are cheap as well. This year I snagged a 100 ct package of wooden spring pins at Walmart for only $2. I call it a yearly expense because we always seem to lose or break a fair amount of pins. 
I honestly have started believing that birds or squirrels are stealing them. I'm really curious as to what they use them for. 

So for an initial cost of $25 and a yearly maintenance cost of $20-$22, I save energy and money in electricity!

Wednesday, April 6, 2011

Weekly Project 4/3-4/9: DIY Nursery Valances

I love recycling in the home. I can usually spruce up a room or change the way something looks without it costing a fortune and without throwing away perfectly good items!

This week's project is a simple set of Nursery Valences. Our nursery has 2 very large windows. I need 2 valances to cover the 2 separate 76 inch wide window spans. Sounds like a lot huh?

A girlfriend and I swap items occasionally. It's our way of clearing out things we no longer want or need without throwing it out. In this case, she had a random single panel navy curtain that I was definitely able to use. I forgot to snap a photo of it before tearing into it, but here's what it looked like in the beginning: 


To start, I took my seamripper to the curtain, quickly demolishing all the seams and removing the tabs from the top. After running it through the wash and ironing the kinks out, I had a full 76" x 57" piece of fabric to work with. Using my own pattern below, I cut the fabric into 4 pieces. 

 
I seamed together pieces 1&3 and 2&4, length-wise. I don't have a serger, so I had to roll the seams and stitch them down to get a good finish that wouldn't fray. I then rolled, ironed and seamed 1 long outer seam and the 2 short outer seams. This left the top seam which needed to accommodate the curtain rod. I double-rolled a 5/8" seam, then folded the edge over 2.5" to create a clean pocket. 

This left me with a 14" valance at just over 111" long. Which leaves me with a perfect mild gather when spanned over 76" windows! 


The fabric and thread cost me nothing, the simple (and cheap - may I emphasize simple again, I wasn't going for très chic) metal curtain rods from the local dollar store cost $3.50 apiece. So for a whopping 7 dollars, I was able to add the perfect window treatment to our nursery!