Sunday, October 30, 2011

Never. Gonna. Happen.

That's what I told Hubby when he asked for a second dog. When he begged. When he pleaded. When he gave me a laundry list of reasons "why another dog is a good idea."

We already have a 4 year old Australian Blue Heeler/Border Collie mix. He's a stroke of luck dog we got at the local shelter shortly after Hubby and I got engaged. Dakota is the smartest, most well behaved dog I know. He follows all our house rules, listens to all voice commands, follows a few hand commands, doesn't jump or bark excessively and won't even snatch food off the floor unless I've given him the okay. He's amazing with both Toddler and Baby Girl and he's intelligent.

I cannot deal with high energy, hyper, loud, "stupid" dogs. The kind who bolt when they're not leashed, won't stop barking at squirrels and knock you over with their exuberance. The hyper kind who scuttle and rush under your feet that you end up tripping over. I didn't think any dog could ever live up to my perfect pet. And so I told Hubby he had no chance in hell of getting another dog until after Dakota dies (hopefully 12-15 years from now). And I told him consistently for over a year. 

For the longest time, Hubby kept asking for an English/American Bulldog Mix: super hyper, not very smart and clumsy, although very very loving. Perhaps perfect for some families, but not at all what I consider a great pet for our family's needs. Then Hubby stopped playing fair (and stopped thinking about solely what he wanted) and started looking for the perfect dog for what I wanted and what would work best for our family instead.

Powerful, protective, gentle, intelligent, great with young children, obedient, friendly, and well "trained" (when you put the work and effort in of course). Don't forget a watch dog, a deterrent to potential break-ins or harmful individuals. Sounds too good to be true, but Hubby managed to find a dog that fits ALL of these qualities. Unfortunately, that means I need to deal with excessive drooling, shedding and SIZE. 

Photo Credit
Yes. Somehow, my harebrained Hubby somehow talked me into getting a Saint Bernard Puppy. 

I'm in the whole nine yards. Potty training, obedience training, dominance training. Constant supervision to make sure the pup is getting the right amount of physical exertion without hurting his SUPER FAST growing bones... to be 100% consistent in training him and making sure I'm the dominant "bitch" of the house. 

3-5 groomings a week (which Hubby has SWORN he will be doing at least 3 of, I'll let you know if he keeps up that end of the bargain) and ALL THE POOP (again, something Hubby has SWORN to take care of weekly, I'll update how that goes as well). 

So, 7 hours in the car and a fair chunk of change later, we have ourselves a 15 lb, 7 wk old male St Bernard. And we named him Apollo. 


To be fair, he's absolutely adorable.
What on earth have I gotten myself into?

Wednesday, October 26, 2011

Pumpkin Tutorial and Bragging on Hubby & Toddler

I hate carving pumpkins. I really dislike the feeling of the goo and guts. And even though they're left uneaten every single year, I still feel compelled to dig out all the seeds, save and clean them, then waste Olive Oil and my time by baking them. And I always challenge myself to carve something extravagant and "fun". This year, Pinterest inspired me to try something different and I left the amazing carving production to hubby. 


Yup. I didn't even cut them open this year. We were able to get these amazing pumpkins at a little pumpkin patch only 20 minutes from us (a huge improvement from last year when we drive 90 minutes and payed out the ass for every little thing). Toddler and Baby Girl were free and they each got a free pumpkin. Hubby and I were $7 apiece and pumpkins were only $3 each, regardless of weight! All of the games and activites were free of additional charge except for feeding the animals, which was only 25 cents for each little cup of food. And corn stalks were only a dollar. I dare you to find anywhere as kid friendly and family oriented with those prices!

On the way home, we stopped at the store to get a can of spraypaint and a package of thumbtacks.
Once home, I started by painting the bottoms. Maybe 5 super thin layers of spray paint and that was covered. I let it dry for an hour and then set them upright to paint the tops and sides. For really good coverage, I painted 6 super thin layers and made sure to get the cracks and crevices around and on the stems.

I then took a thick sharpie to the short pumpkin. That's all it took to do the spider web pumpkin. 
As for the spider, I spray painted the tacks with some spare black paint. This is a total of 70 tacks, one package from the store... if you want to do anything more extravagant, be prepared with plenty of them! They don't go as far as you'd think! This design was freehand, I wasn't looking for anything too flashy or complicated. All in all, I'm really happy with how they turned out! When kids are Trick Or Treating, I'll light a tealight or two in front of them so they're more visible.


I cannot help brag on hubby's awesome carving skills though! Look at that Haunted House!
And this is were I admit that Toddler BEGGED me to carve her a ghost. And I conceded. So it wasn't a completely carve free year for me, but that little ghost only took 8 minutes start to finish so I wasn't too upset by it, seeing as Hubby's pumpkin took almost an hour. And I downright refused to save seeds, which Hubby didn't mind at all.


And of course, Toddler's pumpkin! We decided to let her do her own instead of her sitting there bored and watching us carve what she wanted. She had a blast and we didn't have to deal with her chirping around us like an overexcited chipmunk while we were gutting a pumpkin with sharp knives.

Wordless Wednesday: Perfect Day at the Pumpkin Patch!

Toddler asked for Pumpkin Costumes, this is the closest I could get an hour before we left. Not to bad if I do say so myself. And oh the wonders of a few spare tshirts and some scrap fabric..

Note the very upset Baby Girl in the right corner?


More than 4 years together!


Toddler always loves the animals. Baby Girl surprised us by getting right in their faces, she loved them!

A Butterfly and a Pumpkin, one on each cheek

Somehow Toddler talked the owner into letting her ride the Yak... oh her powers of persuasion work on everyone but Mommy.


Wednesday, October 19, 2011

Wordless Wednesday: Early Morning Fire

It's that time of year again. The time of year when we start waking and ending the day with a fire in the fireplace. 

It's so cozy and comforting. A great way to start the day.

Baby Girl is intrigued. She spent 30 minutes staring while I got breakfast started and folded laundry.

It's always been a favorite activity for toddler. Love that bed head lol.

Thursday, October 13, 2011

Playroom Curtains, Finally Finished!

Toddler is fairly destructive. She's just curious, wants to take things apart and hasn't come to the understanding that I can't always fix what she "disassembles". This went for her cheap vinyl window blinds as well. So I had to come up with curtains she would leave alone. This meant no generic free-hanging gathered curtains (she likes to hang on them and spin in them, not an option). So I found THIS DIY Roman Shade link on Pintrest and had a plan!

First of all, the above tutorial was a sew-free project. I'm a sew-er, so I modified the plans to fit my abilities (I just don't feel as capable with fabric tape, I feel like it would just fall apart.) Secondly, I needed fabric. We didn't find anything Toddler and I both loved at all 3 "local" fabric stores. Since we drove 90 minutes to get to them, it was frustrating to say the least. But.... redemption. We were looking for crayons, glue and other supplies at Target and Toddler grabbed a package of Twin Sized Sheets off a Clearance End Cap. I almost told her to put them back because she still sleeps in a toddler bed (or our bed... usually our bed). But a lightbulb clicked. I don't anticipate the need for blackout curtains in a playroom, so why not use this fabric? 


It was a success, we've decided to work the rest of the playroom off the colors of this fabric! And as a bonus, for only $7, I had enough fabric for the curtains and an entire flat sheet of fabric to spare for any other projects I think of for the play room.

Thirdly, I needed cheap vinyl blinds, regular Elmer's Glue and a hot glue gun.

Then I decided I wanted a valence for the treatment as well. So I found two of my old skirts, one pink and one teal, both miraculously matching the fabric Toddler picked out. There was just enough fabric to complete two valences for the two windows. Then, instead of a traditional rod, I wanted to try something a little more whimsical and cut a few small dry branches out of our brush thicket. I spray painted them and used plant hangers to fix them onto the wall. I then custom fit the valence to the branch and tada!

Here is the finished window treatment!


What do you think?

Wednesday, October 12, 2011

Wordless Wednesday: Baby Girl Explores the World Around Her

Comfort 101: Thumbs are Always the Right Size

Imitation = Flattery

Even Little Girls can beat Monsters!

Puppy Love

Saturday, October 8, 2011

Frame It Up!

I found a terrific little shop in Springfield. The owner attends estate sales throughout the area and sells terrific items! I found 2 completely UGLY frames with a LOT of potential! I didn't take before photos (oops!) but the square frame was aged gold. It is a plastic frame and it was hideous. But I knew there was potential so I nabbed it anyway. Honestly, I regretted the purchase by the time I was driving home. And again a day later. But I went ahead with re-purposing it anyway and I'm very happy with the results! And the larger rectangular frame was antique red wood. Painted a few times with gouges, chips and weathered. I loved it the way it was but had a different idea for the room I'm placing it in. 

Isn't it gaudy? I love it! Honestly, gold was too much. And some would say sunshine yellow is a little much too. I think it's perfect to draw attention to the simplicity of the project we're putting in this frame.

I did decide to leave the original matting alone, it's a little weathered and aged, I like how it isn't too shiny, it adds depth.

I had to share the detail of the frame, I love it! I'm glad the black tones it down a bit, otherwise it would be too busy for the project I want to frame in it.
Oh the miracles of spray paint; I think I'm in love. These are going to house a few projects I'm doing with toddler to hang in the play room when we're done ripping the walls out, insulating them (again, why oh why was this house built without insulation?!?) and redoing the drywall. I'm keeping my ideas to myself until they pan out, but I'll be making a few tutorials throughout the fun filled process! 

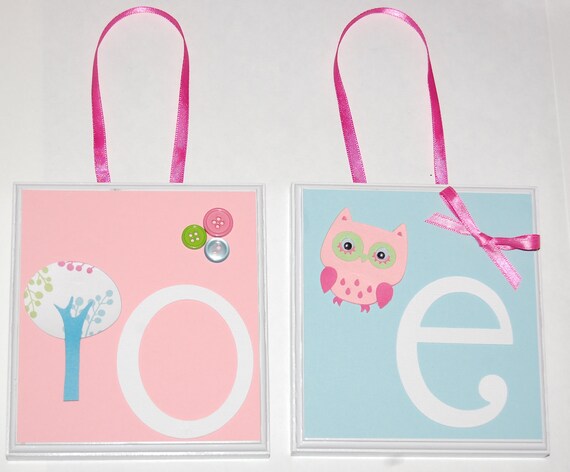
And this is a project I did with Toddler. It's a simple wooden craft panel and letter from the local craft shop. We mixed the paint colors from Clementine Art to match the playroom colors. I gave Toddler the paint and a sponge and let her at it. After the paint dried, I helped her glue the letter to the board. She had a ball and I love how personal the finished product is! I especially love the exposed glue that makes it so lovingly homemade looking. She did  terrific job for a little girl!